Hi to all fellow crafters'

I have only recently started to blog more seriously than I did previously, hope you like what you see. :) If you would like more information on a particular project please ask and I will see what I can do. I have now started doing challenges, I will hopefully be doing one every month. To go direct to my challenges please click on the link from the right. Hope you can join in I would love to see your creations. x


PLEASE NOTE that new challenges, winners and previous winners can now be found at the top of the page.

Followers

Saturday 21 December 2013

Let it snow

My post today is for my DT sample for MTTC challenge, the theme is white on white christmas. Hope you will join us in this fun challenge.
I started with an a6 card, my first layer was black card. My next layer is and embossing folder trimmed slightly leaving a small border. My sentiment is a sticker from my craft stash, I embossed the same folder again and cut off the frame part which I placed on my card using foam pads. I added two snowflakes and glitter to finish.


Thank you for taking the time to view my blog, all comments are much appreciated x

Saturday 14 December 2013

Christmas birds

It's challenge time again over at MTTC the theme is Christmas birds, please pop over and take a look.
I started with a 4x4 red base card which I added a smaller piece of gold card. I then embossed a piece of white card and inked the edges. I added a peeloff around the edge of my topper before placing on my card and finished with a little glitter, card candy and a bow.


Thank you for taking the time to view my blog, all comments are much appreciated x

Saturday 7 December 2013

Cute & cuddly

My card today is my DT sample for MTTC the theme is cute and cuddly. The challenges are fun and there is lots of inspiration, hope you can join in.
My card is a simple 5x5 card, using green as my base card colour. I embossed a piece of patterned card slightly smaller for my first layer, I then added my two toppers and finished off with adding small silver snowflakes.


Thank you for taking the time to view my blog, all comments are much appreciated x

Sunday 1 December 2013

Christmas

My card today is my DT sample for "Feeling crafty challenge"  The theme for this month is Christmas. My base card is A5, I first cut an oval aperture and added border peeloffs around the apertue. I also added border and corner peeloffs to the outer edge of the card. My image inside the card is from one of my crafty cd's. I finished with a die cut tree and snowflakes.


I am entering this into the challenges over at http://cdsundaychallenge.blogspot.co.uk/ the cd I used is Joanna Sheen - Thomas Kinkade.
Also  http://craftascene.blogspot.co.uk/

Thank you for taking the time to view my blog, all comments are much appreciated x

Saturday 30 November 2013

Thinking of you

Today's post is my DT sample card for MTTC, there is no theme for this challenge, all you need to do is follow the sketch.
My base card is 5x7 and the first layer is a backing paper from my stash. I made a small and medium sized frame from teh same paper and layered them onto mirror card. I placed the larger one over the small one and added my sentiment. The topper is a decoupage image from my stash, this was then added to the card. I finished by adding the decorative corner and gems.


Thank you for taking the time to view my blog, all comments are much appreciated x

Tuesday 19 November 2013

Blog hop

I have just done a lovely blog hop, it is run by Creative expressions and there are loads of fab prizes to be won. To start the blog hop click HERE and just simply follow the links to each blog and leave a comment.
Good luck eveyone x


Saturday 26 October 2013

Butterflies

Todays post is for my DT sample for MTTC weekly challenge, the theme this week is butterflies. My base card is 5x5 and my first layer is a black matt which is slightly smaller than my base card. My next layer is embossed with a dotty embossing folder and then corners cut with one of my punches, I then cut a scalloped circle aperture and placed acetate behind the circle before layering onto my card. I then cut a small circle and stamped my sentiment.  My butterfly is a peeloff which I placed onto acetate and added gold flakes to the back.


Thank you for taking the time to view my blog, all comments are much appreciated x

Thursday 24 October 2013

Important notice

I have 2 unclaimed prizes, if they are not claimed before the 31st October I am sorry to say but I will use the prizes for future challenges.
I would like to ask that if you are entering my challenges that you please check under the winners tab to see if you have won and contact me to claim you prize.

Would these two ladies please contact me via email comischef@btinternet.com to claim your prizes.
Butterflies challenge winner 26/8 - 7/9  Jackie C over at http://getthejclook.blogspot.co.uk/  
Challenge Winner 7/10-19/10  Andrea over on  http://artyandrea.blogspot.co.uk/

 Thank you for taking the time to view my blog x

Saturday 19 October 2013

Congratulations

Congratulations is the theme for MTTC challenge this week and here is my DT sample. I started with a 6x6 card, after using my 'Love arch' die from Tonic to cut the first  and matt layers they were placed onto my base card.  I then used another die from the set and used the inner section to stamp my image and coloured the outer section along with some of the hearts that came out of the main die with a spectrum noir pen. After colouring my image I placed this layer onto my card and finished by adding the sentiment and placing the hearts.


Thank you for taking the time to view my blog, all comments are much appreciated x

Tuesday 15 October 2013

Crafty Erin

Erin is one of my daughter's friends who loves to to do all kinds of craft, when my daughter Holly asked me to make a card for Erin she said anything orange and craft related. I thought for a while and then remembered the 'flippin women' decoupage sheets I had so decided to go with this, it was the orange that threw me a little as I don't use it very often. Anyway I started with orange as my base card and cut an aperture in the centre using one of my many dies, I then used the same die and cut an aperture from the centre of a piece of cream card cut slightly smaller than my base card. I stamped the words and button images randomly onto the card before placing acetate on the back of the back. I then used bakers twine to thread through the holes on the buttons. After cutting my front and back decoupage images out I put the front images into place and layered the cream card onto my base. I placed my matching insert on the inside of my card and added the back images of the decoupage. I finished with die cut name and numbers with added gems.


Thank you for taking the time to view my blog, all comments are much appreciated x

Tuesday 1 October 2013

Autumn Humphrey

Today my card has an autumn theme, just the thing for the new challenge over on Felling crafty challenge blog formally know as Emmas crafty challenge.
My card is 6x6 and simply matt with a paper printed from the Humphrey cd. I then used a die shape which I inked and to matt my image of Humphrey, also printed from the cd. I used a red pen to outline the edges of my matt and topper and added pearly doodles to finish.


Thank you for taking the time to view my blog, all comments are much appreciated x

Saturday 28 September 2013

Thank you card

My post for today is a thank you card, this is my DT sample for MTTC  who run a weekly challenge.
I started by placing my inner and outer tonic dies near to the top of a sheet of A4 card. once they were stuck in place I marked where I wanted to cut from. I placed the card and dies onto my cutting plate matching the edge of my top plate to the markers on my card I then everything was run through my machine. I then removed the outer die and placed everything back and embossed as normal. I then folded the card where the cut line finished and trimmed my card so has just enough left to put a border. I used my outer die again with mirror card and placed this behind my shape on my card. After punching my border and matting onto mirror card this was added to my card along with corner peeloffs. To finish I made a topper using the two smaller inner and out dies and added a sentiment.


Thank you for taking the time to view my blog, all comments appreciated x

Thursday 26 September 2013

My sale blog

Hi everyone, after card making for a few years now and not having much of an outlet to sell my creations I thought I would try selling via a blog. The link to my selling page is on the left, I would be grateful if you could pop over and take a look.

Thanks for taking the time to view my blog, all comments are appreciated x

Saturday 14 September 2013

Autumn leaves

This is my DT sample for MTTC the theme this week is autumnal. My base card is A5, the first layer is yellow and the second black. My next layer I stamped with leaves and lightly coloured with a distress ink. I then put a smaller black matt onto my card and trimmed a piece of photo paper slightly smaller to make my next layer. I then stamped leaves using versamark ink and a coloured ink, I put clear embossing poder ontop and heat till melted. I then used coloured inks with water and dried with heat gun to get the colour I wanted. To finish I added a flower and sentiment.


Thank you for taking the time to view my blog, all comments are appreciated x

Sunday 1 September 2013

Birdy

My post for today is my DT sample for Emma's crafty challenge  this month's theme is birds. My card is 4x4 and I first layered it with a flowery paper from my stash, I inked the edges and attached ribbon before placing it onto my card. I stamped and coloured my bird image, I then placed my circle die around the image leaving some of the bird out of the circle. I marked where the die should go and snipped into my image slighty, then placed the die back and cut and embossed as normal. I inked the edges of the circle and added it along with some gems to finish.


Thank you for taking the time to view my blog, all comments are appreciated. x

Saturday 24 August 2013

Fishing

Fishing is one of my other halfs hobby's so this card was made for him. It fits the MTTC sports themed challenge perfectly so this is my sample to show. My base card is a 5x5 which I used some scraps of paper to create my border. The image is a digi image which after printing and colouring I used a wonky rectangle spellbinders die to cut it out and inked the edges before removing the die. I drew around the die for a faux layer and layered the two pieces together. This was then placed onto my card, I used card candi to complete my card.


Thank you for taking the time to view my blog, all comments are appreciated. x

Monday 19 August 2013

Apologies

I would like to apologise to all my followers and friends, I will not be able to post for a while. I am not very well at the moment and can't get to my main PC. I will not be able to do any challenges either, I will post again as soon as I am able to keep you all up to date. X

Saturday 10 August 2013

Roses

My card today is made using one of my favourite stamps. It is an older card but thought it was very suitable for the MTTC blog 'Aperture' challenge. I started with an A5 card and cut my oval aperture in the centre of the front of my card. I stamped and coloured the full rose image on the inside of my card so it could be seen through the aperture. I then stamped and coloured teh image another couple of times cut out a small section of one of them leaving a small border to use on the outside in the bottom corner. I then did the same for the top corner only using the flower heads which I decoupaged. I then added gems to finish.


Thank you for taking the time to view my blog, all comments are much appreciated. x

Monday 5 August 2013

Floral

This is my DT sample for Emmas crafty challenge, the set theme this time is 'Floral' My base card is 6x6 to which I added a layer of lilac pearl card trimmed to leave a small border. the second layer is embossed using an embossilicious folders, again trimmed to leave a small border. I then attached ribbon to co-ordinate with teh lilac card. My topper was made using a tonic die I recently bought, I cut the main die in white card and then used the outer die to create the silver mirror card layer. I did the same for the sentiment layer using white and lilac card. I added my layers to my card, and finished by adding a sentiment, bow, flowers and droplets used from http://www.threecscreations.com/


Thank you for taking the time to view my blog, all comments appreciated x

Saturday 27 July 2013

With sympathy

Making sympathy is very hard for me as I don't like to make them. This one I made as a request from my mum so couldn't refuse. This is the theme for MTTC challenge this week so here goes. It is a very simple card, starting with an A6 card I used silver mirror card as my first layer leaving a small border. I then used a piece of white card slightly smaller than the mirror card and used a border embossing forlder at the top and bottom. I used a spellbinders die to cut the cross and drew around it to creat a faux layer, after layering them together they were placed onto my card. A peeloff sentiment was added to finish off.


Thank you for taking the time to view my blog, all commments are appreciated. x

Saturday 13 July 2013

Glamorous 20's

My DT sample for MTTC, the theme is using the two colours turquoise and brown. I wasn't sure I liked this colour combo at first but as I made my card it kind of grew on me. My base card is 8x8 and started with a brown mat. I then used turquoise card and embossed using an embosilicious folder and inked around the edges. I cut out two shapes from the same set of spellbinders dies, I inked both of them before removing the die. My image is a stamp from Kanban which I coloured using spectrum noir pens. I layered both my die shapes onto brown card so it could be seen through the shape. I used foam pads on my image and two shapes and then placed them onto my card finishing by adding some gems.


Thank you for taking the time to view my blog, all comments are appreciated x

Saturday 6 July 2013

Under the sea

Under the sea is the theme for the Craftateers over on their blog. There are four craftateers who make a project each week, taking it in turns to choose a theme. Their projects are posted to help with inspiration to other crafters.
My card for this project starts off as a 6x6 card. The first layer is trimmed a little smaller, to create the background I sprayed cheap shaving foam into a shallow dish. I then dotted alchol inks into the foam and swirled it around using the tip of a small paintbrush, I placed my first layer piec of card into the foam and pressed lightly. Once it was covered in the foam I then used a bone folder to scrape off the excess and the end results is just amazing. I then stamped my seaweed image onto this layer and placed it onto my card. I stamped and coloured my shells, fish and parcels. After cutting them out placed them onto my card. I stamped a sentiment to finish.


Tuesday 2 July 2013

Pearls and lace

This is my sample for Emma's crafty challenge, the theme is pearls and lace. I had to think what to do for this as only had one piece of ribbon. I started off with my blank card and used one of my new tonic punches to create my borders. I then thread ribbon through my lace and added threee small sections to my card. I added my pearls which started off white but I coloured them with a spectrum noir pen to co ordinate with my ribbon. I then used a small spellbinders die to cut my shape for my sentiment, added my sentiment to finish.


Thank you for taking the time to view my blog, all comments are much appreciated. x

Saturday 22 June 2013

Ballerina

My post today is a card sample for MTTC 'spots and stripes' challenge. Some of you will recognise it from samples I did for a recent challenge here on my own blog, i thought it would eb nice to share and let you all know how it was made.
I started off with an A4 piece of card and made it into a stepper card. I used a stripey backing paper to cover the centre panel and across the bottom. I then embossed two small pieces of card to fit the outer panels using a dotty embossing folder. I stamped and coloured my ballerina onto a spellbinders die cut shape. My sentiment is a peeloff placed onto a die cut tag which I used ribbon to attach to my card. To finish I added peeloff corners and gems.


Thank you for taking the time to view my blog, all comments are appreciated x

Thursday 20 June 2013

Thanks a bunch

Todays post is my DT sample for shernocky crafts I started with an A5 card to which I added a layer of core impressions, I had trimmed it, inked the edges and sanded to reveal the inner colour first. The topper is one of the PaperArtsy HP1109 stamps images which I used  to stamp onto watercolour card. I used  three Tim Holtz distress inks to build my image vintage photo for the flower stamp, forest green to add a little colour to the leaves and faded jeans for the flowers. Once my image was done I used frayed burlap to ink around the edges of my topper. I placed a piece of just ribbon down the centr of my card before putting on my topper. A very simple card but hope you like it.


Products used
Jute ribbon (supplied by www.shernockycrafts.co.uk
PaperArtsy HP1109 stamps (supplied by www.shernockycrafts.co.uk)
Crafters companion tape runner (supplied by www.shernockycrafts.co.uk
Cardstock
Core impressions cosmo cricut
Tim Hotlz distress inks, vintage photo, faded jeans, forrest green and frayed burlap.

Thank you for taking the time to view my blog, all comments are appreciated. x


Wednesday 19 June 2013

Quick challenge

I am so thrilled to be asked to join the Crafts Galore (formally Cards Galore) facebook group Design Team. Each day there will be a member of the team doing something different so everyone can join in the fun.Today there is a quick challenge with a winners badge up for grabs. Please pop over and take a look you have until 9pm tonight to post your entry.
This is the card I entered to give a little support to Zoe who is the DT member running todays challenge.


My card is 6x6 and I first cut and embossed my tonic die straight into the front of my card. I placed gold mirror card on the inside to show through my cut out shape. I then used a smaller die from the same set along with the die that cuts the actual die from the card, and used the outer die again to cut the actual shape from mirror card. I placed the two together and after stamping my sentiment I placed it onto my card with foam pads and added little gems to finish.

Thank youf or taking the time to view my blog, any comments are much appreciated. x

Saturday 15 June 2013

Father's day

Sorry I have not posted in a little while, but I have been in the garden. We in Scotland have to take advantage of the good weather has it is very rare :)
My post for today is a father's day card I made for hubby from my daughter Holly. I started with an A4 piece of card and scored it at 8 inch mark and folded to create my front section. I inked the edges and layered the golf text paper on the inside of the card and also on the front flap. I then trimmed two small pieces of the tartan paper and layered one on the right edge and one on the front flap of my card. I inked a small piece of the golf text paper and matted it onto white card. I cut out a wonky rectangle spellbinders die shape and inked the edges before removing the die. I then stamped my golfer image onto my rectangle shape and stamped out my text. After placing my toppers I finished off with adding card candi.


Thank you for taking the time to view my blog, all comments are appreciated. x

Wednesday 5 June 2013

Fan

My second DT sample for Shernocky crafts

The main piece was done using the embossing board and gold card. Next was one of the Graphic 45 birdsong papers to be embossed, another layer of gold card was used for the third layer. For the top layer I used the oriental design of the Graphic 45 papers and embossed the triangle like shapes.


I then cut out all the pieces, all the layers were put together with the tape runner except the triangle shapes which I used foam pads. I then placed the charm to finish.


Products used 
Graphic 45 birdsong papers (supplied by www.shernockycrafts.co.uk
Crafters companion tape runner (supplied by www.shernockycrafts.co.uk
 Gold cardstock Keepsake fan embossing board
Charm 
Foam pads

Saturday 1 June 2013

Bookmark

My post for today is my DT sample for the challenge over on MTTC. The theme is 'Bookmark'. I started off with 2 different size of card and trimmed the top two corners off. I then stamped a swirl pattern with black ink on the larger piece of card and then inked the edges using crushed velvet and faded jeans Tim Holtz distress inks. On the smaller card I used the same distress inks but I put some of the ink onto my craft matt and sprayed with water, I then simply rubbed my card into the ink until it was covered. Once dry I stamped  the flowers and added the gems.
The idea of the two layers is so you can slip the page of your book between the two.


Thank you for taking the time to view my blog, all comments are appreciated. x

Saturday 25 May 2013

Sketch

Another new challenge over on MTTC, the theme this week is a 'Sketch' to follow.


I chose to do my card black and white and is a 6x6 card. My first layer is black card, which is placed onto my base card leaving a small border. My second layer I trimmed slightly smaller that the first and stamped it randomly with a musical note stamp and placed this onto my card. I then made my next two layers, each smaller than the previous layer. I created a smaller layer from black card and a smaller piece of white card on which I stamped using the musical note stamp, this is then placed onto my card. My border across the middle is black card layered with white card. The main image I made using two dies, the white layer I stamped my drums image then layered the black die shape on top. To finish I added star, gems and a sentiment.


Thank you for taking the time to view my blog, all comments are appreciated. x

Thursday 23 May 2013

Graphic 45

I have some exciting news, I have been chosen to join the Shernocky Crafts design team. I am really thrilled to be asked, so a big thank you to Shirley.

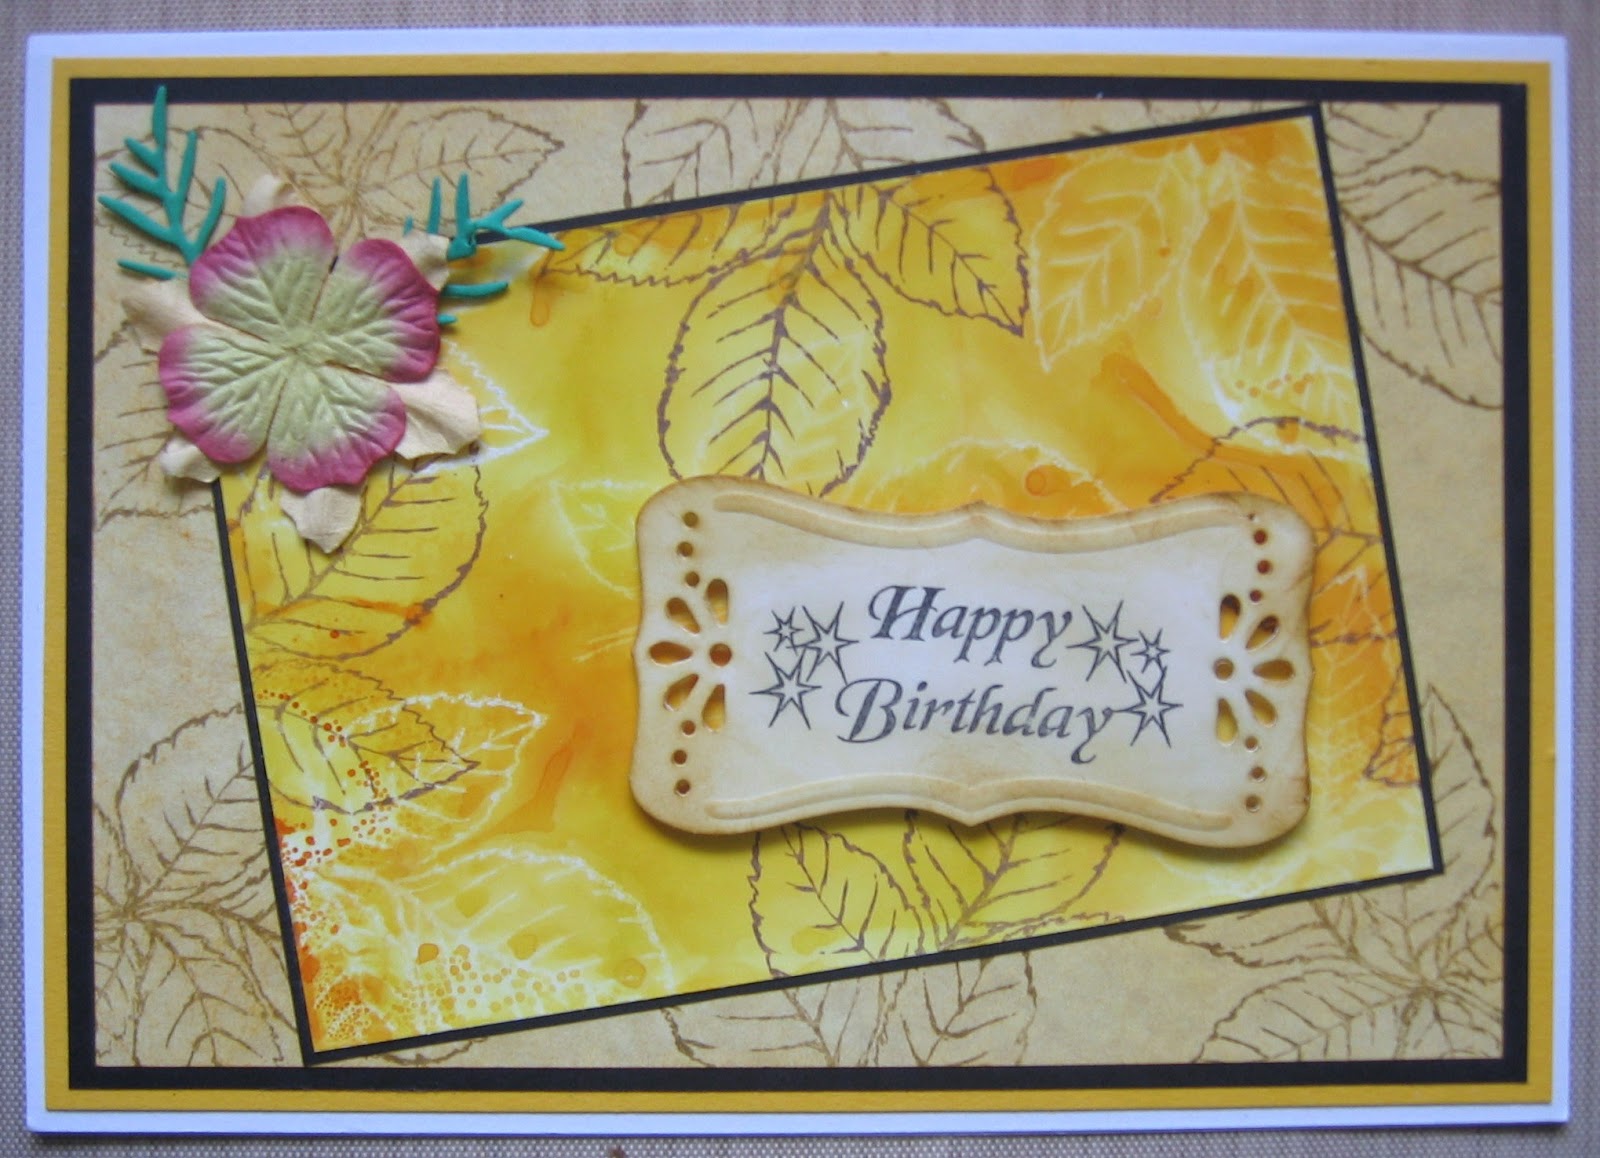
My first DT sample is a 6x6 card.


I made a matt from gold card and cut it slightly smaller than my base card. My next layer was a black card matt which is a little smaller than the gold matt. I then made two smaller mats, again slightly smaller than each other. I took a piece of the Graphic 45 design paper and layered it onto cream card matching the base and placed this onto the other layers on the base card. I chose one of the pictures the Graphic 45 papers and matt onto black and then gold card, I placed this topper onto foam pads and put it onto the card. To finish I used a piece of ribbon and placed it onto black card, I put 3 of the brads in place and tied a knot from the ribbon and put it into place.


Products used

8 x8 Graphic 45 birdsong papers (supplied by shernocky crafts)
Hobby house ribbon (supplied by shernocky crafts)
Hobby house pearl brads (supplied by shernocky crafts)
Crafters companion tape runner (supplied by shernocky crafts)
6 x 6 card
Gold, cream and black cardstock
Foam pads
 

Wednesday 22 May 2013

Gift bag

Hi everyone, I was at a loose end yesterday morning so decided to have a go at decorating a bag.


For this I measured the size of the bag and cut a piece of white card so it fits leaving a small border, inking the edges before putting onto the bag. After trimming a decorative paper I inked the edges and placed this on my first layer. I chose contrasting decorative papers to make the borders running across the bag, again inking the edges before placing onto my previous layer. I then made a topper from another piece of decorative paper, matting it onto pearlised card. I added a tag with a sentiment, which I threaded ribbon through to attach to my topper. I used foam pads to attach the topper to give a little more dimension. I added flowers, card candi and a die cut butterfly to finish.

Thank you for taking the time to view my blog, all comments are appreciated. x

Saturday 18 May 2013

Ice cold

My time to craft blog challenge this week is 'Christmas in May' Please pop over and take a look and join in the fun. My DT sample is an A5 base, using holographic silver card as my first layer leaving a small border. I then used a backing paper, again leaving a small border. My next layer is in 3 sections, the two outer sections are embossed with a snowflake folder and the middle section a dotty embossing folder. I stuck them altogether using a small piece of paper on the back crossing over the joins. I then inked around the edges and placed this as my next layer. I cut out one shape in holographic card the other in white after printing my digi image. I then added silver stars and a sentiment.


Thank you for taking the time to view my blog, all comments are apprceiated x

Saturday 11 May 2013

Let's see the inside


Show us the inside of your card is the theme for this weeks challenge over on MTTC The card I posted a little while ago click here to view. I decided as part of the inside was already done I would finish it off for my DT sample. I simple pieced in a section of card next to the one that has the black corners on, I then placed a piece of ribbon matching the one on the front to hide the join. I used the same card and dotty embossing folder on the left of the card to match, finishing with a peel off sentiment.


Thank you for taking the time to view my blog, all comments are appreciated x

Thursday 9 May 2013

Pink and blue

My post for today is my first DT sample for Emma's Cards Uk blog challenge. The theme is 'Pink and Blue' and I chose pastel colours to use.


My base card is 8 x8 to which I added a slightly smaller piece of pink centura card. I then embossed a piece of white card which is smaller than the first layer creating a border. I inked the edges with ink before layering it onto my card. I then used the decorative labels die to cut out a large blue and small white shape. I used the scallop circle to cut out a pink shape and white card to cut a small circle. The small labels shape I inked the edges pink and the small circle I inked with blue. I stamped and heat embossed my sentiment onto the small white circle. I then punched my border and layered this onto a piece of pink centura card and attached pink ribbon and then made and added the bow. I placed this onto my card then added my die shapes and to finish I added gems.

Products used
8 x8 card
Pink and blue centura card
White card
Tim Holtz Tumbled glass and spun sugar distress inks
Embossalicious roses folder
Spellbinders decorative labels one, scalloped circle and circle die.
Martha Stewart punch for border.
Verse stamp, silver embossing powder ribbon and gems

Thank you for taking the time to view my blog, all comments are appreciated x

Saturday 4 May 2013

Sentiment

The new challenge over on MTTC is 'sentiment' as the main focus. This is my DT sample. My card is A5, and first layer is a piece of pearl card slightly smaller than base card. My next layer is slightly smaller than the first, which I embossed and then inked the edges. The topper is a die cut from pearl card and stamped with my sentiment, just to add a little decoration I used a flower and a leaf die from my collection.


Thank you for taking the time to view my blog, all comments are appreciated x

Saturday 27 April 2013

Sailor boy

This is my sample card for the MTTC new challenge, the theme is 'Use Kraft' I had a think about what to do and as I don't do many male cards I thought it was time I did. I started off with my base card and trimmed a piecce of blue card to fit the bottom section leaving a small border. I then stamped the little sailor boy shirts onto my piece of kraft paper and trimmed to matt onto my blue layer, again leaving a small border. I stamped the little boy image and coloured before placing it onto a blue matt. after putting my two layers onto my card I added card candi to finish.


Wednesday 24 April 2013

April showers

This card I made a while ago but thought it was very appropriate for kraftyhands challenge. My base card was 6x6 and I started by matting some patterned paper onto a slightly larger blue square piece of card which was slightly smaller than my base card. I then took two pieces of the same blue pearl card the same size and on one piece I placed some contrasting patterned paper and on the other I placed white card after I had stamped the steps image. Next I placed the first matt onto my card, I then used one of my punches to create the border and placed ribbon onto it before placing it onto the card. I then placed the layer with the steps image onto the card before putting on the stamped image of the little girl which I  coloured and cut out and put foam pads on the back to raise slightly. To finish I added a few gems and a sentiment, hope you like it and thanks for looking.


I am entering this card into kraftyhands challenge

Saturday 20 April 2013

Glamour

My post for today is my DT sample for My time to craft The theme is 'stitching', my base card is a dl which I haven't done in a long time. I started by using black card for my first layer, then used a backing paper to layer onto that. I then made a small matt of black card and layered it with a contrast paper. I used one of my dies to cut the shape and inked the edges, after stamping my image onto the same paper as one of my layers I mounted it onto my die shape. I added a sentiment, gems and card candi to finish.


Thank you for taking the time to view my blog, all comments are much appreciated.

Saturday 6 April 2013

Clean and simple

This is my DT sample for MTTC the challenge this week is 'clean and simple' I found this a little hard to do, I always want to add more to my cards. So I chose a smaller card 4x4 with a decorative edge, I then simply stamped a sentiment and used a rub on image I found in my stash.


Thank you for taking the time to view my blog x

Friday 5 April 2013

Someone special

I have been asked to make a card for Audsentiments new challenge 'project for a child with a sentiment' I hope you like what I have made.
My card is 8x8 and I used a backing paper as my first layer, trimmed to leave a little border. I made two matts with a second paper and layered these onto silver mirror card.  The image is from Imagine that digi images by Kris I coloured this and then layered it onto lilac pearl card, I attached my two matts then placed my image and sentiment onto my card. Finally to finish I used a die for the border and added gems.


Thank you for taking teh time to view my blog x

Thursday 4 April 2013

Summer scene

My post for today is something I haven't done for ages. I was looking for challenges to enter and came across Joanna Sheen blog challenge 'come rain or shine', after some thought I decided on making a summer scene as we all could do with some sunshine. I chose to use the Faye Whittaker stamps and cd I have had for a while and not used very much.
My card is an 8x8 easle card, I placed the sky paper on the folded part of the card and placed the beach paper on the inside. I then stamped out my images and coloured, after cutting them out I placed them onto my card using foam pads and added twine for the kite. Very simple but I enojyed making it, hope it brightens your day.


Thank you for taking the time to view my blog x

Tuesday 2 April 2013

Humphrey

My card today is done using an 8x8 card, my first layer is trimmed slightly to leave a border on my base card. I put my first layer through my calibur using a buttons embossing folder, I then inked the edges. I then stamped my humphrey image and coloured with spectrum noir pens. I used a die to cut out my image and inked the edges, I also created a faux shape with the same die for an extra layer. I put twine over the bottom of the first layer before placing it onto the card. I then put on my image, buttons with twine through and a sentiment to finish off.


Thank you for taking the time to visit my blog x

Monday 1 April 2013

Shrink plastic

Good morning everyone, I decided to have a play with shrink plastic recently. As my daughter is a Mcfly fan and due to go the the concert soon I thought I would make her a little something. I started with a length of chain and added the fasteners, I then chose some nestie dies to cut my shapes from shrink plastic. Once my shapes were cut I stamped 'Mcfly' onto the star and inked over it. I punched holes in all the shapes and heated them until they shrunk, I then attched links and attached them to the chain. My daughter loves it and will wear it at the concert, an original I thnk.

Thank you for taking the time to view my blog x


Monday 25 March 2013

Glorious shoes

My post today is using a 6x6 card, I started by cutting away part of the front. Then used core' dinations cardstock and embossed using a dotty design, cutting this to fit both the front section and the inside of the card. I then stamped one of the party paws stamps, after colouring I cut it out using a nestability die and inked the edges. I placed this on my card and added die cut corners and ribbon.


Thank you for taking the time to view my blog, all comments appreciated x

Saturday 23 March 2013

Gothic look

The MTTC challenge this week is 'Gothic', I didn't really know what to do for this as this is not really my kind of thing so hope you like what I have done.
I started with a square card, and after a long search found the image and paper in my stash. I simply matt both the paper and image onto silver mirror card, then the image again onto black card. I added ribbon before placing my first layer onto the card. I then added the image, sentiment and gems.


Thank you for taking the time to view my blog, all comments are appreciated x

Wednesday 20 March 2013

Important notice

I have been receiving messages regarding my challenges. I would just like to let you all know that I am still doing my them, I have just moved them to the side panel on the right as I thought it would be easier for people to find. Winners can also be found in the panel on the right.
My challenges run every two weeks, and always start on  Monday. There is always a fab prize up for grabs and winners are always chosen using random.org. I always look forward to seeing your creations, so when your crafting please remember you have to be in it to win as the saying goes.

Thank you for reading this post and look forward to seeing your creations x

Saturday 16 March 2013

Bunnies

This card is my DT sample for MTTC, this weeks theme is bunnies. I had made this card a while ago but perfect for the theme. I have to admit this was not all my own work, it was actually a project I recieved through Dimension stamps. All the pieces came ready cut and I just needed to add the stamped images. The base card was 6x6, using matching card I stamped my flowers and matt this layer onto gold mirror card. I stamped my image onto the circle shape that came with the project and matt it onto the scallop circle. To finish I coloured the rabbit and added a sentiment and bow.


Thank you for taking the time to view my blog, all comments are appreciated x